![Highland_logo_1millionmiles_Brandmark_White-1.png]](https://24210048.hs-sites.com/hs-fs/hubfs/Highland_logo_1millionmiles_Brandmark_White-1.png?width=40&height=40&name=Highland_logo_1millionmiles_Brandmark_White-1.png)
Start a Charging Session
- Verify that the bus parking brake is on and the key is in the OFF position. Bus can charge while on, when needed for pre-heating or cooling
- Check the charger’s LED status. If the color is other than green or blue (refer to the LED Indicator guide), report the issue by following your company’s issue reporting procedures. Be sure to tell them the time, date, and charger ID with which the error occurred
- Once the above steps are confirmed, remove the charging handle from the holster on the charger, connect the handle into the charge port on the bus. Make sure to firmly insert the plug into the port until you hear the ‘click’ of the port lock
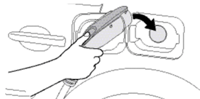
- Observe the charging dispenser LED indicator. Look for fast flashing green (charger and bus are connecting) then slow flashing blue (bus is charging)
- Before walking away, verify the charger and bus have connected by checking BOTH the bus dashboard and the charging dispenser to ensure they both indicate the bus is charging
End a Charging Session
- Unplug the charger handle from the charge port on the bus at any time, this will end the charging session
- Return the charger handle to the holster on the charger
- Coil up the cord to prevent accidental damage Never leave the charging handle out in the open or on the ground
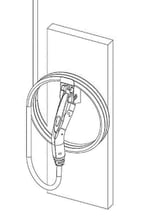
- Coil up the cord to prevent accidental damage Never leave the charging handle out in the open or on the ground
For additional details on LiteOn chargers , please refer to the LiteOn User Manual