![Highland_logo_1millionmiles_Brandmark_White-1.png]](https://24210048.hs-sites.com/hs-fs/hubfs/Highland_logo_1millionmiles_Brandmark_White-1.png?width=40&height=40&name=Highland_logo_1millionmiles_Brandmark_White-1.png)
Driver Daily Checklist
Pre-Trip daily checklist
Before starting the electric vehicle, check the following conditions:
- If the bus was left charging and is now ready for its trip, secure inactive handles in the holster on the charger
- Coil inactive cords on to the holder on the charger
- Check that the outer charge port door is closed and sealed properly
- Check that the 12V battery door is closed and sealed properly
- Verify the driver and all passengers have properly secured seatbelts
- Verify that the parking brake is engaged
- Verify that the Drive Selector is in P (PARK)
- Report any charger issues (including physical damage) to the shop. Be sure to tell them the time, date, bus number, and charger ID the issue occurred with
- Report any bus physical damage to the shop
Post-Trip daily checklist
- On the bus, turn the temperature and setting dials to the blue zone
- Confirm the bus key is in the off position
Do not leave the key in the ignition when exiting the vehicle, and do not leave the ignition switched to ACCESSORIES. These conditions can drain battery charge and reduce vehicle range.
- If charging the bus, plug the handle into the charging port on the bus
- Ensure active charger cords are out of the walking path of staff and other vehicles
- Report any charger issues (including physical damage) to the shop. Be sure to tell them the time, date, bus number, and charger ID the issue occurred with
- Report any bus physical damage to the shop
Vehicle Operation
To start the bus, do the following:
Vehicle will not start unless all steps in the procedure are followed correctly
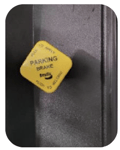
- Apply the parking brake. Turn OFF the headlights and all accessories
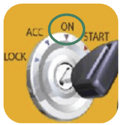
- Turn the key to ON position. Using the 12V battery voltage gauge in the cluster, verify that voltage is at least 12.9 volts. If the gauge does not reach 12.9 volts within 5 seconds, turn key to OFF position, wait until bus completely shuts down, then retry Step 1
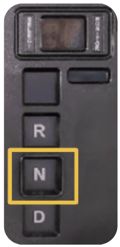
- Set the drive mode selector to Neutral (N)
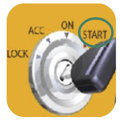
- Depress and hold the brake pedal. Then, set Key to START position

- Verify that the Drive Enable indicator illuminates GREEN. If the Drive Enable indicator does not illuminate within 5 seconds after pressing START, wait 5 seconds and then retry Step 4. (This is normal when the air brake system has no pressure)
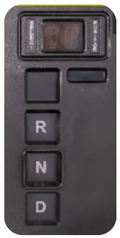
- While brake pedal is depressed, select appropriate gear: Drive (D) or Reverse
- When the key is in the ON position, it is common to hear components such as cooling pumps and air compressors operating. This is normal
- If restarting the vehicle after a recent Key OFF, driver must wait 30 seconds after the gauge cluster display is OFF before attempting to restart the vehicle
- Do not press the accelerator when powering on the vehicle
A/C System Operation
To start the A/C system, do the following:
- Ensure that the bus has power
- Swiftly press and release the Auto1 button; it will illuminate. If it doesn't light up, repeat the first step. Avoid holding the button; instead, give it a sharp tap.
- You can now use either the up or down button on the left panel to regulate the temperature
- Utilize the vent up button resembling a fan to adjust the blower speed according to preference
- To power down the system, press and release the Auto 2 button
For additional details on IC buses, please refer to the IC Bus Operations and Maintenance Manual